Game Scenes
Now that we know how the engine, editor and projects are setup on a filesystem level,
we can take a closer look at how a game is structured logically.
Overview
Since everything in a game is just loose data and files,
there needs to be some supporting structure to manage it.
A very common approach is to use a scene-based structure, which Pyrite64 does too.
Each scene defines a set of objects with behaviours, and general settings for the game.
So for example: placing a player object, collectables, an object controlling music and so on.
While loading a scene all the objects defined in a scene are spawned, and the game logic is handled by them.
When a scene gets unloaded, all of its objects are then removed from the game, and the next scene is loaded.
In other words, each scene starts from nothing, and returns to nothing when it’s done.
Giving you total freedom what kind of game you want to make.
This can go so far as mixing completely different game types into one (e.g. Minigames).
Most commonly you will have very similar scenes to implement levels in a game,
and a few special ones for things like menus or credit scenes.
Scene-Graph & Objects
Now lets take a look at how a single scene is set up.
Besides some generic settings like framebuffer setup and meta-data,
the key part is the scene-graph.
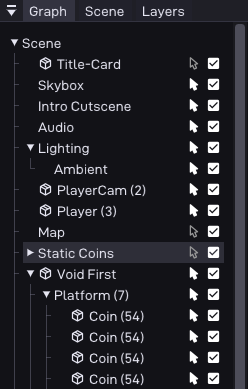
This consists of a tree of objects, where each object can have any number of children.
Each object can then be assigned a set of components, which define individual behaviours.
Objects
An
Object in Pyrite64 is a generic container for components.Other engines may also call this an
Entity or Actor.In contrast to an approach via inheritance / OOP, this here is a data-driven approach.
So each object you place in scene will not get its own C++ class,
there is only one fixed
P64::Object class in the engine.The components that are attached to an object are just data,
and at runtime the engines logic can iterate over them to call specific behaviour.
In the editor an object could look like this:
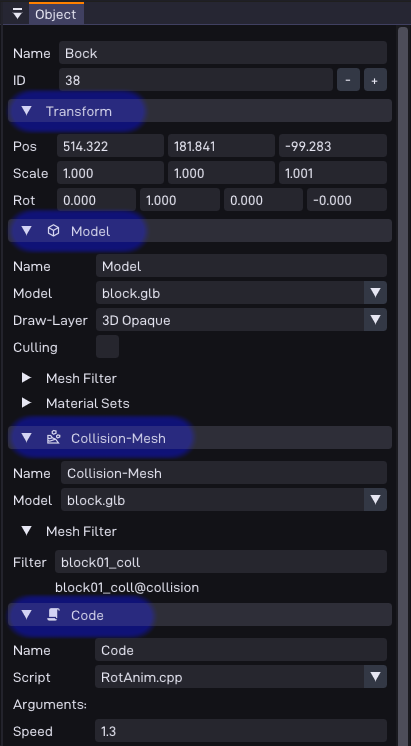
I’ve highlighted the components in blue in the screenshot.
As you can see, this object here has a position, 3D-Model, Collision, and some custom C++ code.
The only thing all objects have in common is a name, ID, and transform (pos / scale / rotation).
Additional components can be added freely per object.
At runtime, the engine will then make sure to call the appropriate code for each component.
So for example running your C++ script one per frame, or calling the draw function for the model.
Going back to the scene-graph, those individual objects can then be put into the scene.
Where once again the engine will iterate over them each frame to update and draw them.
Assets
Some components may reference assets, which are files in the
assets directory of your project.This includes things like textures, 3D models, and audio files.
In general, assets exist outside of the scene logic inside a global asset-manager.
Meaning components can request a file, which will load if if not already there,
and then get back a handle to it.
This way, multiple objects can reference the same asset without needing to load it multiple times.
This is automatically cleaned up when the scene ends.
Another benefit of this is that objects/components can stay small in size,
since they themselves don’t embed any large data, but just reference it.
Scene-List
Since a game can have multiple scenes, there needs to be a way to manage them and switch between them.
In the editor you can easily create new scene in the scene manager:
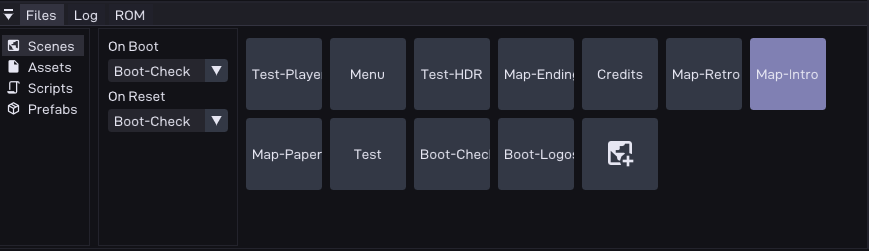
(More on that later in the Editor documentation)
You can define on which scene your game starts,
and at runtime also call APIs to switch between scenes.
Everything combined now gives you the tools to create entire games.