3D Models
3D Models are handled internally by the tiny3d library.
The only accepted source format is GLTF, exported as .glb.
This will be used for the mesh itself, materials, skeletons and animations.
Limitations
Meshes
The is no limit on the amount of meshes, vertices or triangles.
However keep in mind the N64 can only handle so much before slowing down.
Vertex attributes are quantized for performance and hardware reasons:
Position -> 16bit signed integer per component
Color -> RGBA, 8 bit per channel
UV -> 10.5 fixed point pixel coordinates
Normals -> 5.6.5 bit normalized
All of this is handled automatically, and usually nothing you have to care about.
The only thing to keep in mind is the vertex position part.
Pyrite64 offers a pre-scaling factor during model conversion, defaulting to x16.
What this means is if e.g. a vertex has the position 1.25, it will be stored as 40 in the final data.
This allows you to model at reasonable scales in blender, while keeping precision.
You can compensate for this by scaling the model up or down in the editor.
Please be aware that wanting 1:1 units with blender will cause precision issues eventually.
So try to not rely on it too much.
If you notice models looking very blocky, or squished to small sizes,
you can try increasing the pre-scaling factor.
By default, the editor tries to show a good scaling range,
so try to keep the general world-scale along the lines of 1unit = 1cm at runtime.
Materials
All materials need to be created with fast64.
This is required since the RDP has a fixed function pipeline,
and there is no large overlap to standard PBR materials.
Embedded textures are not supported,
textures must be present as PNG files in the assets folder.
If you are using the special HDR+Bloom or 256x-Texture pipeline in a scene,
you will need more specific material setups.
Those are explained in the render-pipeline documentation:
(@TODO: write render-pipeline documentation)
Skinning
While there is no limit on bones or animations, bone-weights are not supported.
This means that each vertex can only be influenced by a single bone at full force,
and by extension a triangle can be influenced by at most 3 bones.
In case weight-painting is used, the converter will pick the bone with the highest weight.
Please also make sure that for skinned meshes,
neither the model nor armature itself has any transforms.
You can apply those in blender to avoid potential issues.
Animation
Animations are only supported for bones.
You cannot use it to transform objects themselves, or drive other values (e.g. materials).
Position, rotation and non-uniform scaling is supported.
Creating Models
Setup
Since fast64 is required, models need to be authored from blender.
You can find both projects here:
For blender, use at least version 4.0, but not 5.0 or newer.
Install fast64 as a plugin, you can do this by downloading the repo as a zip:
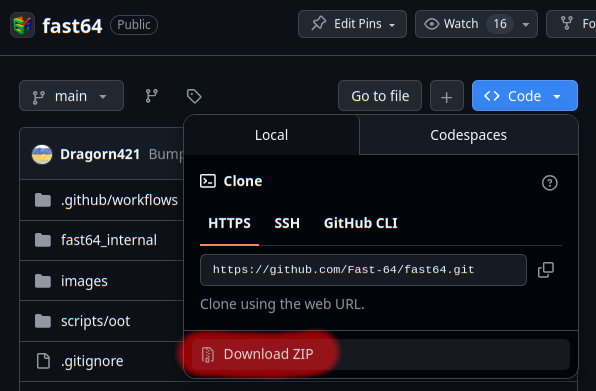
In blender under Preferences -> Add-ons -> Install from disk,
you can then select downloaded zip file.
Modeling
If you are new to fast64 or N64 in general,
it is a good idea to use existing .blend files as starting point.
You can find some in the example projects of Pyrite64.
Alternatively, in the examples of tiny3d: Examples
Besides the already mentioned limitations,
there is nothing special about the mesh or animation part.
So we will focus on the materials now.
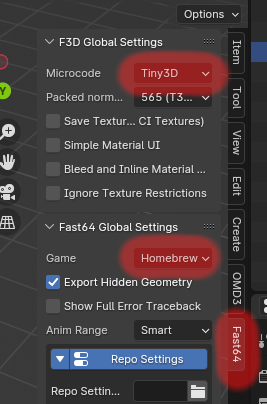
Materials
First make sure fast64 is set to tiny3d and Homebrew mode,
otherwise the preview may not be accurate.
Now we can create a material for our model.
For that click on the “Create Fast64 Material” button in the material properties.

With a new material, uncheck “Show Simplified UI”, otherwise it may hide details.
If you don’t see a white box now, make sure you are actually in Material Preview mode.
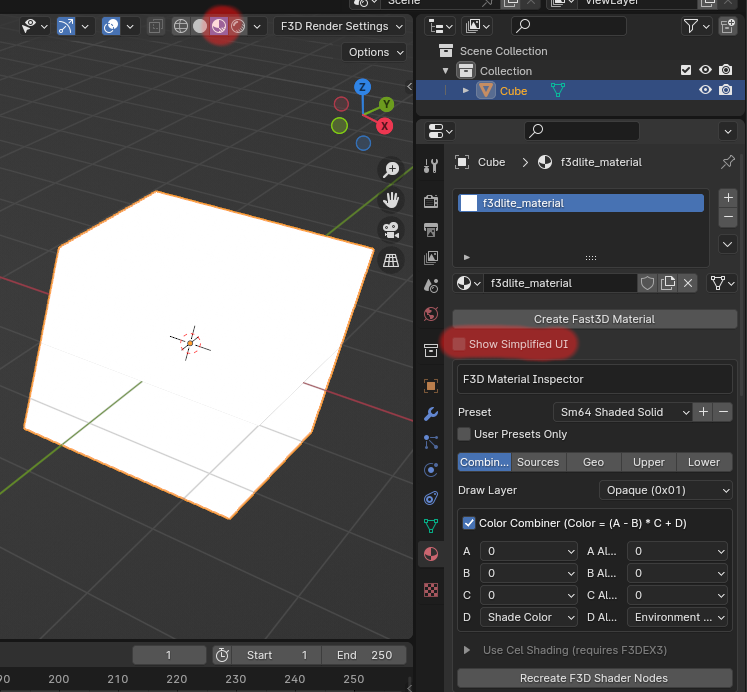
In this initial view, you can now configure the color-combiner.
Which are the inputs of the fixed-function pipeline of the RDP.
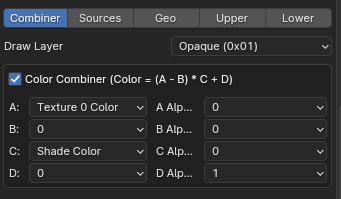
The formula is fixed to (A - B) * C + D, where you define which source to use for each variable.
For example, a simple textured and lit material would look like this:
If you selected a texture, you now also have to define it.
You can find those settings in the “Sources” Tab.
Textures used here must be PNG files in the assets folder.
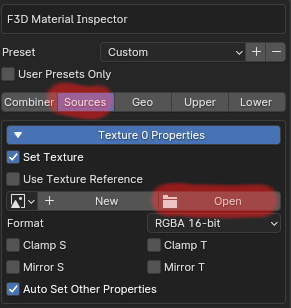
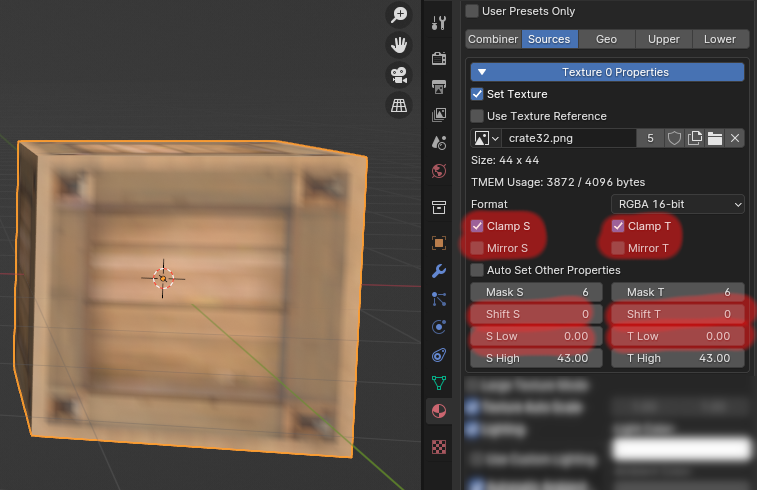
After a texture is selected, you are presented with some extra options.
Those are “Tile Settings”, which is effectively the image-sampler on the RDP.
This lets you set things like clamping, mirror, repeat, as well as a scaling factor.
If you selected a generic color-register like “Primitive” or “Environment”,
You will be able to set those values there too:
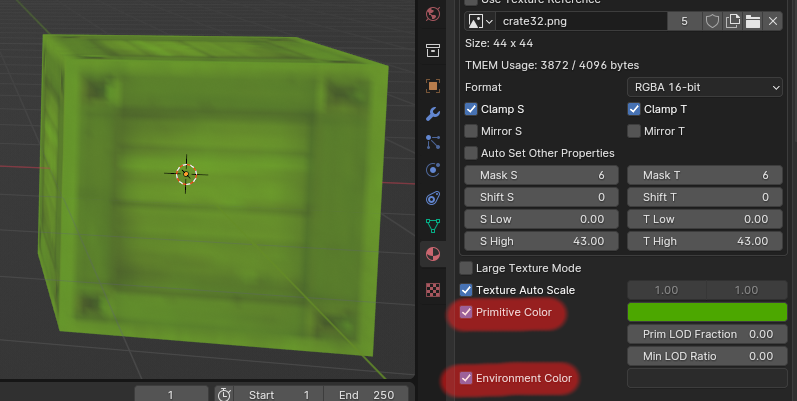
The checkbox next to it lets you define if you want to embedd the color or not.
If unchecked, it allows (and requires!) you to set the color in the editor.
Warning
The RDP has a global state, color-registers and textures will stay until they are set again.
If a material uses a register but never sets it, it uses whatever came before.
For more advanced effects, you can also enable “2-Cycle Mode”, which gives you two CC rounds.
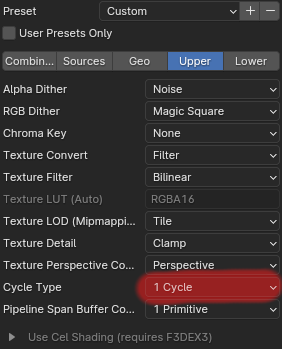
A full list of all currently supported settings can be found here:
Fast64 Settings
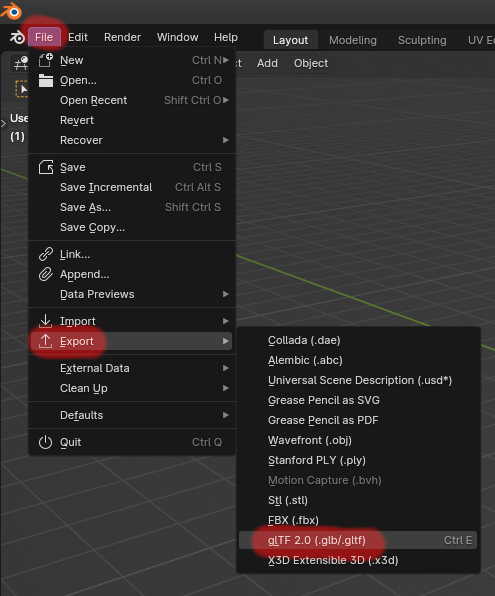
Export
Once your model is ready, you can export it via the builtin GLTF exporter.
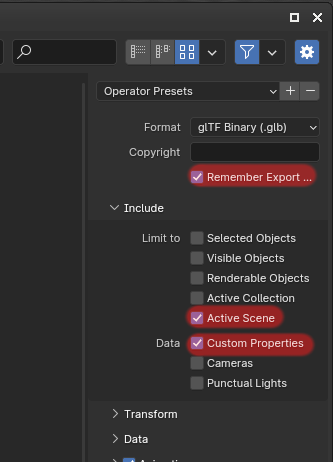
Please also check the following settings, for subsequent exports those will be remembered:
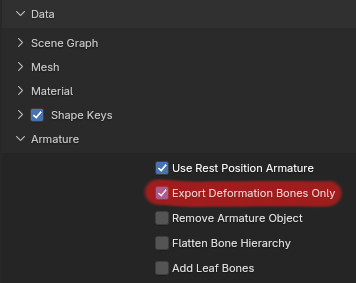
For skinned meshes, please also enable this setting to prevent any artificial bones to be exported:
After exporting the .glb file into your projects asset directory, you can now use it in the editor.
Performance
Materials
Besides the obvious “use less triangles vertices”, one thing to consider is materials.
Especially textures changes cause memory traffic, which is the main bottleneck on N64.
So try to creatively use textures to minimize changes.
Using many different materials also makes it slightly less efficient to draw,
due to the reduced potential for triangle-strips.
Armatures
Vertices are pre-transformed into bone-space during conversion.
What that means is that the cost of a bone is a single matrix switch no matter the skeleton structure.
Nevertheless, try to avoid any excessive use of bones, since CPU time can also increase with them.
Animations
Animations are time-based, so the exact frame-rate in blender doesn’t matter.
All keyframes are also optimized by first resampling them to 60FPS,
followed by reducing them until an error-threshold is reached.
Keyframes are then internally stored in a single combined timeline.
Those are the internal details, what that means for you is
that keyframes in blender do not exist 1:1 at runtime.
So any complicated curves, dense sections,
or empty gaps will be baked and simplified automatically during build.